Water Heater Repair in Concord, CA

Water heater repair, installation, replacement, and maintenance in Concord and beyond

plumber handles water heater repair in Concord by tightening intake lineMost people have had an experience where they have run out of hot water during a shower, and it is never a pleasant one. We use water heaters for several different tasks around the house, and when your stops working it can be particularly troubling.

Having access to respected hot water heater contractors like Plumbing Solutions will ensure your water heater is up and running again in no time. We provide service to the residents of Concord, CA and surrounding area, and all it takes is one call for us to be there with the solution you need.

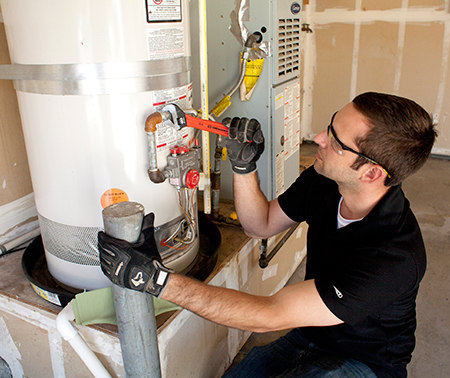
Our Concord plumbers offer a ten point water heater systems safety and maintenance service that covers the entire hot water system in your home.

  • Gas Regulator Valve or Electric Heating Element

  • Emergency Shut Off Valve

  • Fittings Check

  • Sacrificial Anode Rod Check

  • Scale Build Up Check

  • Sediment Check and Flush

  • Thermostat

  • T&P Valve Check

  • Water Inlet Connection Check

Fast & Affordable Water Heater Repair

What sets us apart from other Concord water heater repair companies?

  • We operate out of “mobile warehouses” that contain parts for the majority of water heater repair needs. That means faster repairs and less time spent waiting.
  • We have experience with every major brand of water heater, including American Standard, GE, AO Smith, Kenmore, Rheem, and more.
  • We are locally owned and operated, which means you’ll keep your dollars local.

Our team has the tools and experience to handle:

  • Gas water heater repair
  • Electric water heater repair
  • 30, 40, and 50 gallon water heater repair
  • Tankless water heater repair
  • Commercial water heater repair
  • Emergency water heater repair

draining a water heater scale buildup during a maintenance call

When it is time for hot water heater repair, you’ll usually see signs that something isn’t right before it stops working altogether. Some of the most common ones include:

  • a leaking storage tank
  • an increase in your water bill
  • loud rumbling or banging during operation
  • water that takes a long time to heat up
  • poor water pressure in your home
  • pilot-light problems
  • Loose pressure relief-valve
  • rusty water
  • clogged drain valves
  • clogged vent
  • no hot water
  • specific faucet or fixture isn’t receiving hot water
  • intermittent hot water availability

Be sure to call us at the first sign of trouble to handle your water heater issues. Our water heater service is available on short notice, and we carry the necessary parts for a variety of common water heater repair needs. That means less time will be wasted before your hot water is restored.

The sacrificial anode system prevents the interior of the water heater from rusting, so that is usually the culprit.

A sacrificial rod is placed in the center of the tank to collect all of the free radicals in the water. These are rough oxygen atom electrons released in the heating process. The released oxygen combines with the material in the anode instead of the steel tank. This causes the anode to wear down and drop a solid precipitate into the tank. This sediment builds up at the bottom of the tank and can cause everything from poor water heating efficiency to a sulfur smell coming from the tap. The best way to prevent this is to flush the system at least once a year.

The experts at Plumbing Solutions have been working on water heaters for decades, and in that time we have worked with every make and model available. If you are experiencing water that looks or smells like rust, call our team for a quick diagnosis.

1. Regular Inspections

Schedule annual inspections with a professional plumber to check for any signs of wear or potential issues. A trained eye can spot problems before they lead to significant failures.

2. Flushing the Tank

Sediment can build up in your water heater tank over time, leading to inefficiencies and potential damage. Flushing the tank at least once a year helps remove this buildup, improving efficiency and extending the life of the unit.

3. Check the Anode Rod

The anode rod is designed to prevent rust and corrosion inside the tank. Check it every 1-2 years and replace it if it’s heavily corroded. A healthy anode rod can significantly prolong the life of your water heater.

4. Adjust the Temperature

Setting your water heater’s temperature to 120°F can prevent overheating and save energy. Higher temperatures can lead to increased wear and tear on the unit and a greater risk of scalding.

5. Insulate Your Heater

Insulating your water heater and the first few feet of hot and cold water pipes can reduce heat loss, helping your unit operate more efficiently and reducing strain.

6. Monitor for Leaks

Regularly inspect your water heater for any signs of leaks. Early detection of leaks can prevent more significant issues down the road and save you money on repairs.

7. Maintain Proper Ventilation

Ensure that the area around your water heater is well-ventilated. Poor ventilation can lead to overheating and reduced efficiency. Keep the area around the unit clear of clutter and debris.

8. Be Mindful of Usage

Understanding your hot water usage patterns can help you manage the demand on your water heater. Avoid running multiple hot water sources simultaneously when possible to reduce stress on the unit.

By following these simple maintenance tips, you can extend the life of your water heater, ensuring it continues to provide reliable hot water for years to come. Regular upkeep not only enhances performance but also saves you money on repairs and energy bills. If you have any questions or need assistance with your water heater, don’t hesitate to contact a professional plumber for help.

Sediment buildup in a water heater is a common issue that can significantly impact its performance and efficiency. Over time, minerals like calcium and magnesium found in hard water settle at the bottom of the tank, leading to various problems. Understanding how sediment affects your water heater can help you take preventive measures and ensure your unit operates optimally.

1. Reduced Efficiency

As sediment accumulates, it creates a barrier between the heating elements and the water. This layer of sediment makes it harder for the heater to transfer heat effectively, causing it to work harder to reach the desired temperature. As a result, you may notice higher energy bills due to increased energy consumption.

2. Decreased Hot Water Supply

With sediment buildup, your water heater’s capacity to heat water diminishes. You may experience fluctuating water temperatures or a reduced supply of hot water during peak usage times. This can lead to uncomfortable situations, especially during showers or while running appliances that require hot water.

3. Increased Risk of Damage

The presence of sediment can lead to several mechanical issues, including overheating and tank corrosion. Over time, the sediment can cause the tank to crack or develop leaks, necessitating expensive repairs or even a complete replacement of the unit.

4. Longer Heating Times

As sediment accumulation hinders heat transfer, your water heater may take longer to heat water to the desired temperature. This not only impacts convenience but can also contribute to further wear and tear on the unit.

5. Unpleasant Odors and Cloudy Water

In some cases, sediment buildup can lead to discoloration or an unpleasant smell in the hot water. This can be particularly concerning for households relying on hot water for drinking, cooking, and bathing.

Preventive Measures

To mitigate the impact of sediment buildup, regular maintenance is essential. Here are some steps you can take:

  • Flush the Tank: Regularly flushing your water heater, at least once a year, can help remove sediment and prevent buildup. This simple maintenance task can significantly improve your unit’s efficiency and longevity.

  • Install a Water Softener: If you have hard water, consider installing a water softener to reduce mineral deposits in your plumbing system and water heater.

  • Monitor Water Quality: Be aware of any changes in your water quality, such as unusual odors or discoloration, and address them promptly.

If you’ve ever faced the frustration of a water heater pilot light that won’t stay lit, you’re not alone. This common issue can disrupt your hot water supply and may indicate underlying problems with your water heater. Here’s a guide to help you troubleshoot and address the issue effectively.

1. Check the Thermocouple

The thermocouple is a safety device that detects the pilot light flame. If it’s malfunctioning or dirty, it may fail to keep the gas valve open, causing the pilot light to go out. Inspect the thermocouple for any signs of wear or dirt buildup. If it’s dirty, gently clean it with a soft cloth. If it appears damaged, it may need to be replaced.

2. Inspect the Pilot Light Flame

A proper pilot light flame should be blue with a slight yellow tip. If the flame is weak or flickering, it may indicate a problem with the gas supply or a blocked pilot orifice. Ensure that the gas supply is turned on and check for any obstructions. A professional can assist with a thorough cleaning if needed.

3. Ensure Proper Ventilation

Insufficient ventilation can affect the combustion process and cause the pilot light to extinguish. Ensure that the water heater is adequately ventilated and that there are no blockages in the exhaust vent. Poor ventilation may lead to a buildup of gas, which is dangerous.

4. Check for Gas Supply Issues

If there’s a problem with the gas supply, it can prevent the pilot light from staying lit. Make sure the gas valve is open and that there are no leaks in the gas line. If you suspect a gas supply issue, it’s crucial to contact a professional plumber or gas technician for assistance.

5. Examine the Water Heater’s Age and Condition

Older water heaters may have more frequent pilot light issues due to wear and tear. If your water heater is nearing the end of its lifespan (typically 10-15 years), it might be worth considering a replacement instead of ongoing repairs.

6. Call a Professional

If you’ve tried the above steps and your pilot light still won’t stay lit, it’s time to call in a professional. Attempting to fix gas appliances without proper knowledge can be dangerous. A licensed plumber can accurately diagnose the problem and make necessary repairs to ensure your water heater operates safely and efficiently.

An overheating water heater can be a serious issue that may lead to leaks, damage, or even a hazardous situation. If you suspect that your water heater is overheating, it’s crucial to address the problem promptly. Here’s a step-by-step guide on what to do if your water heater is overheating.

1. Turn Off the Power Supply

If you notice that your water heater is overheating, the first step is to turn off the power supply. For electric water heaters, locate the circuit breaker and switch it off. For gas water heaters, turn the gas control valve to the “off” position. This will prevent further heating and reduce the risk of damage or a potential explosion.

2. Check the Temperature Setting

Many water heaters have a temperature setting that can be adjusted. The recommended setting for most households is between 120°F and 140°F. If your temperature is set higher than this, it could be the reason for the overheating. Once the power is off, check the thermostat and adjust it to a safe temperature.

3. Inspect the Temperature and Pressure Relief Valve (TPR)

The TPR valve is a critical safety feature designed to release excess pressure and temperature from the tank. If it’s malfunctioning or blocked, it may not release pressure when needed, leading to overheating. Check the valve for any signs of corrosion or leaks. If it’s not functioning properly, it will need to be replaced by a professional.

4. Look for Sediment Buildup

Sediment buildup in the tank can cause overheating as it prevents proper heat distribution. This is particularly common in areas with hard water. Flushing the tank can help remove sediment and improve efficiency. If you’re comfortable doing so, turn off the water supply, drain the tank, and flush it to remove any sediment. If not, consider calling a professional plumber to perform the flush.

5. Assess the Anode Rod

The anode rod helps prevent corrosion inside the water heater tank. If it’s severely corroded or has completely deteriorated, it can affect the tank’s ability to function properly, leading to overheating. Check the anode rod and replace it if necessary. This is typically recommended every 3 to 5 years, depending on water quality.

6. Contact a Professional

If you’ve followed the above steps and your water heater continues to overheat, it’s time to contact a professional plumber. They can conduct a thorough inspection to identify any underlying issues that may be causing the overheating, such as faulty thermostats or electrical problems.

7. Consider Replacement

If your water heater is old and frequently overheating, it might be more cost-effective to replace it rather than continuing to repair it. A new, energy-efficient model can provide better performance and peace of mind.

Water Heater Maintenance

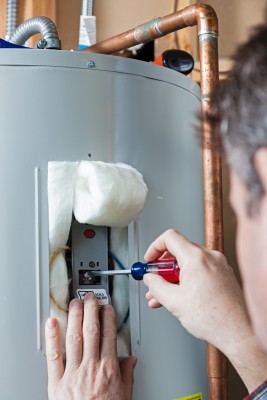
Most water heater problems come from a lack of proper maintenance. While not all problems can be avoided, they can be identified before something catastrophic happens. Take the thermostat, for example. A stuck thermostat can cause your heating element or gas control valve to be stuck in an open position. This is not only a huge waste of energy, it also makes you much more likely to scald yourself on hot tap water. In addition, a stuck thermostat in combination with a faulty temperature and pressure release valve can cause the water heater to explode! The best fix for a malfunctioning thermostat is a simple replacement that usually costs under $100.

We want to help you avoid unnecessary water heater repairs, even if that means less short term business for us, because we want to be your go-to plumber for the long haul.


Water Heater Replacement & Installation

Rinnai tankless water heater

If your water heater is older or is beyond repair, then it’s time to replace it. Some homeowners try to avoid it so they won’t have to incur the upfront expense, but you will see several benefits from a new unit. Your energy efficiency will improve, you won’t have to worry about those annoying cold shots of water, and your water bills will even out.

We also offer new water heater installation. Adding a secondary water heater to your home is a great way to ensure consistent supplies in larger homes, or homes with larger families. We can also install water heaters in new construction.

At Plumbing Solutions, we offer installation of both tanked and tankless water heaters. Each type of water heater has their own unique benefits, so be sure to speak with a specialist before making a decision.

All of our water heater installations are backed by manufacturers warranties, and we may also be able to offer additional warranties on parts and labor, depending on the model you choose. Please call today to learn more about your water heater installation options.

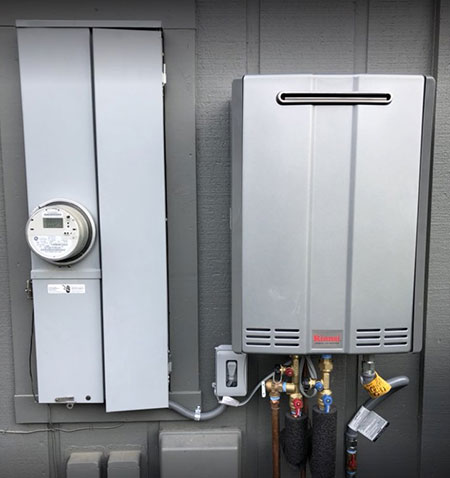
We Also Cover Tankless Water Heaters

Whether you need tankless water heater repair, or whether you’re looking for a new installation, we can help. These high efficiency water heating systems can offer significant improvements to performance, operating costs, and lifespan with a smaller footprint and no water heater tank. Learn more about our tankless water heater services.


The installation process for a water heater typically takes anywhere from 2 to 6 hours, depending on several factors:

1. Type of Water Heater

  • Tank Water Heaters: Installing a traditional storage tank water heater usually takes about 2 to 4 hours. This includes removing the old unit, preparing the space, and installing the new heater.
  • Tankless Water Heaters: Installation may take longer, generally around 4 to 6 hours, especially if additional plumbing or electrical work is needed.

2. Complexity of Installation

  • If there are significant modifications required, such as upgrading electrical systems or gas lines, or if the installation location is difficult to access, this can extend the installation time.

3. Location

  • The installation time may vary based on where the water heater is located. If it’s in a basement or a tight space, it might take longer compared to a more accessible location.

4. Removal of Old Unit

  • If the installer needs to remove an existing water heater, this will add time to the process. The condition and type of the old unit can affect how quickly it can be removed.

5. Permits and Inspections

  • In some areas, obtaining permits and passing inspections can add time before or after the installation. A professional plumber will know the local regulations and may take this into account.
Whether you need a permit for water heater installation depends on local building codes and regulations, which can vary significantly from one area to another. The good news is that our team can handle 100% of the permitting process for you.

Here are some of the factors that can determine whether or not a permit is necessary:

1. Local Building Codes

  • Many municipalities require a permit for the installation of a water heater, especially if it involves changes to plumbing, electrical systems, or gas lines. It’s essential to check with your local building department to understand the specific requirements in your area.

2. Type of Installation

  • Replacement: If you are replacing an existing water heater with a similar model, a permit may not be necessary in some areas, but it’s best to confirm.
  • New Installation: Installing a new water heater in a location that previously did not have one typically requires a permit.

3. Energy Efficiency Regulations

  • Some areas have specific regulations regarding energy-efficient installations that may require permits to ensure compliance.

4. Professional Installations

  • If you hire a licensed plumber or contractor, they will usually handle the permitting process for you. It’s part of their service to ensure that the installation meets all local codes and safety regulations.

5. Safety Considerations

  • Permits are often required to ensure that installations comply with safety standards, helping to prevent issues such as gas leaks, improper venting, or electrical hazards.

The lifespan of a typical water heater can vary depending on the type and maintenance but generally falls within the following ranges:

  1. Conventional Tank Water Heaters: These units typically last between 10 to 15 years. Factors such as the quality of the unit, water quality, and maintenance practices can affect their longevity.

  2. Tankless Water Heaters: Also known as on-demand water heaters, these generally have a longer lifespan, lasting about 15 to 20 years. Their durability often stems from their design, which doesn’t involve storing water and reduces the risk of corrosion.

  3. Point-of-Use Water Heaters: These small, localized units usually last around 10 years. Their shorter lifespan is often due to the smaller size and usage patterns.

Regular maintenance, such as flushing the tank to remove sediment buildup and checking the anode rod, can help extend the lifespan of any water heater. It’s also important to be aware of any signs of wear or malfunction, as addressing issues promptly can prevent more significant problems down the line.

If you experience low water pressure after installing a new water heater, you should call us back to fix it.
Here are just a few of the things we’ll check:

1. Check Other Fixtures

First, determine if the low water pressure is isolated to the new water heater or if it affects other fixtures in your home. Turn on faucets in different areas to see if the problem persists throughout the house.

2. Inspect the Installation

Ensure that all connections and fittings from the water heater to the plumbing system are properly installed and secured. Look for any leaks or loose connections that might be affecting water flow.

3. Examine the Shut-off Valve

Check the shut-off valve on the water supply line leading to the water heater. If it’s not fully open, it can restrict water flow and cause low pressure. Make sure it’s turned all the way to the open position.

4. Check for Air in the System

Air trapped in the plumbing system can lead to fluctuations in water pressure. To release trapped air, open several faucets in your home, starting with the highest one, and let them run until the water flows steadily.

5. Inspect the Pressure Relief Valve

The pressure relief valve on the water heater is designed to prevent excessive pressure buildup. If it’s malfunctioning or incorrectly set, it might be impacting the overall pressure in the system. Consult the manufacturer’s instructions or a plumber if you suspect an issue.

6. Look for Clogs or Sediment Buildup

Sediment or debris can accumulate in the water lines, especially if your water supply has high mineral content. Check the inlet screen and water lines for any blockages that might be impeding flow.

7. Check the Temperature and Pressure Relief Valve (TPR)

If the TPR valve is leaking or malfunctioning, it can affect water pressure. Inspect the valve for signs of wear and ensure it is functioning correctly.

Why Call Plumbing Solutions?

Our customers get a range of benefits from working with us, including:

  • Strong Warranties

    We offer a labor warranty on all work, and the equipment we install comes with generous manufacturers’ warranties.

  • Same Day Service

    We will get to you the same day you call, so you don’t have to wait around for help.

  • Locally Owned and Operated

    Plumbing Solutions is headquartered in Concord, and we’re happy to keep your dollars local.

  • Professional Service

    Our team answers calls, returns them promptly, arrives on time, and respects your property.

  • Highly Rated

    We think our Google, Yelp, and other online reviews speak for themselves.

  • Honest Pricing

    We offer customers flat-rate pricing so there is no need to worry about hidden fees or charges.

  • Satisfaction Guaranteed

    If you aren’t satisfied, we aren’t satisfied. We will keep working until you are.

  • Dependable Technicians

    Our technicians are friendly and honest, and will treat your home like it was their own.

Plumbing Solutions are Just One Call Away